Install AI Image Generator(Optional)
Generator is optional
Generator requires your computer to have at least Nvidia RTX3050 performance, 8GB or more video memory graphics card. If you do not have a graphics card that meets the requirements, do not install the Generator, just use the API.
Note:Make sure you have the nvidia driver installed before installation
1. Install Python 3.11
-
For Windows OS,Please search python3.11 in windows store and install it.
-
For Linux ,Please search installation method by yourself, or refer to the official website.
https://www.python.org/downloads/
2. Download the package of the Generator
Download the newest generator.zip in the page: https://github.com/tonera/fluxsd/releases and unzip it.
Linux or Mac
wget https://github.com/tonera/fluxsd/releases/download/{version}/generator.zip
unzip generator.zip
cd generator
Windows
Download generator.zip from https://github.com/tonera/fluxsd/releases and unzip the file. And then , open a terminal window of PowerShell in the package folder.
cd generator3. Create python virtual environment
python -m venv .venv
. .venv/bin/activate
or
python3 -m venv .venv
. .venv/bin/activate
If your system is Windows, Then run the following command in your PowerShell
python -m venv .venv
.venv/Scripts/activate
It is possible that you will encounter an error message that the.ps1 file cannot be loaded because Windows security policies prevent the script from running and you need to execute it as an administrator
Set-ExecutionPolicy Unrestricted4. Install Generator
pip install -r requirement.txtAttention:Because of a bug in one of the packages, be sure to modify the Generator directory:
.venv\Lib\site-packages\basicsr\data\degradations.py Modify the line 8
from torchvision.transforms.functional_tensor import rgb_to_grayscaleBe changed to:
from torchvision.transforms.functional import rgb_to_grayscale5. Install Torch and CUDA
Note: Only Nvidia series graphics cards are supported
Open https://pytorch.org/ and select options based on your actual configuration. Finally you will get the generated installation script.
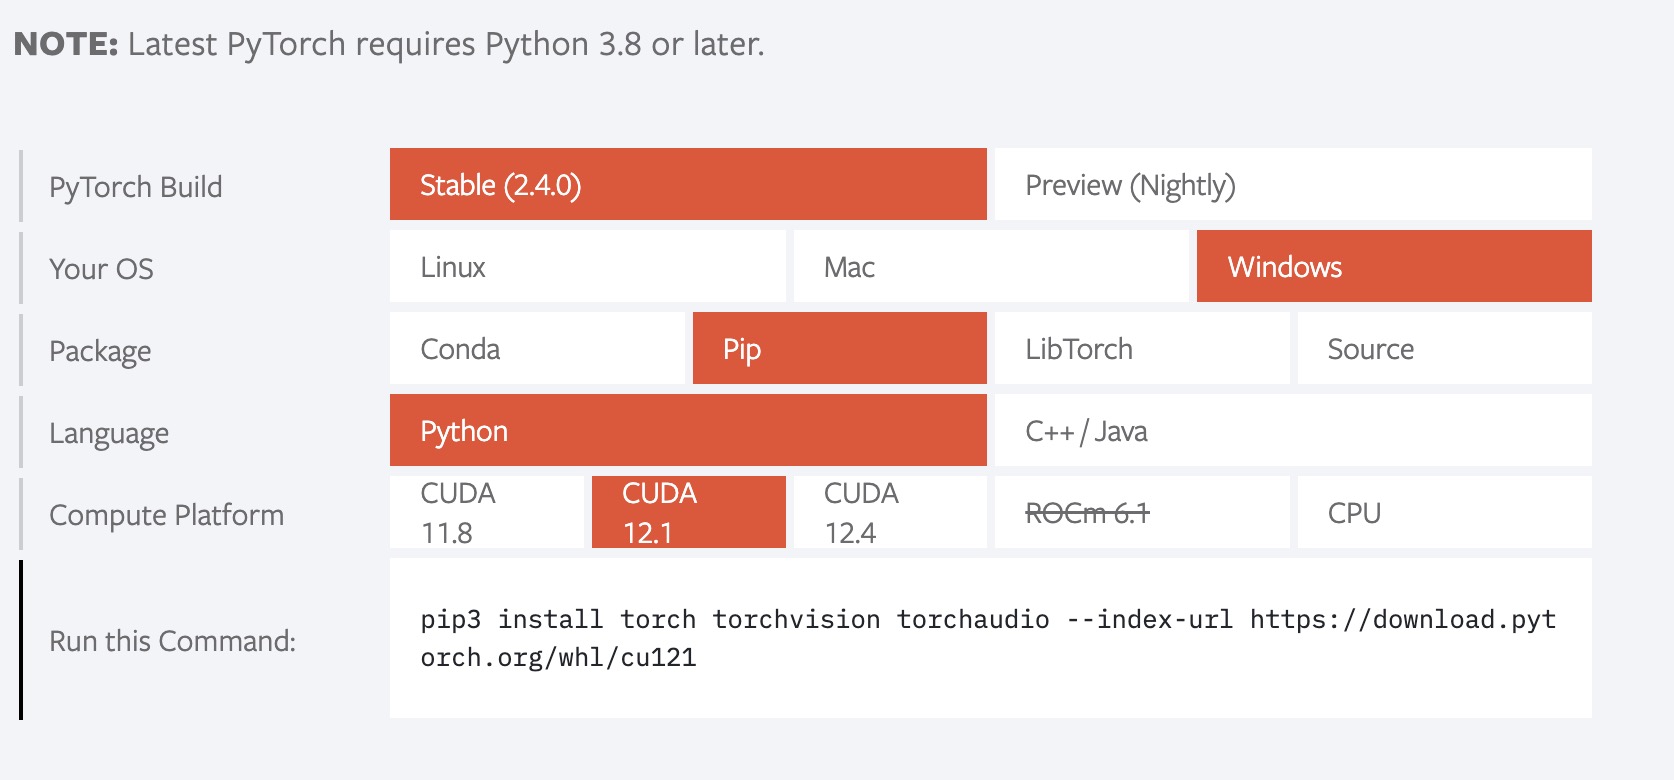
For example, if the CUDA driver version of the graphics card is 12.4, run the following command to install it
pip3 install torch torchvision torchaudio --index-url https://download.pytorch.org/whl/cu124How to check your CUDA version?
nvidia-smi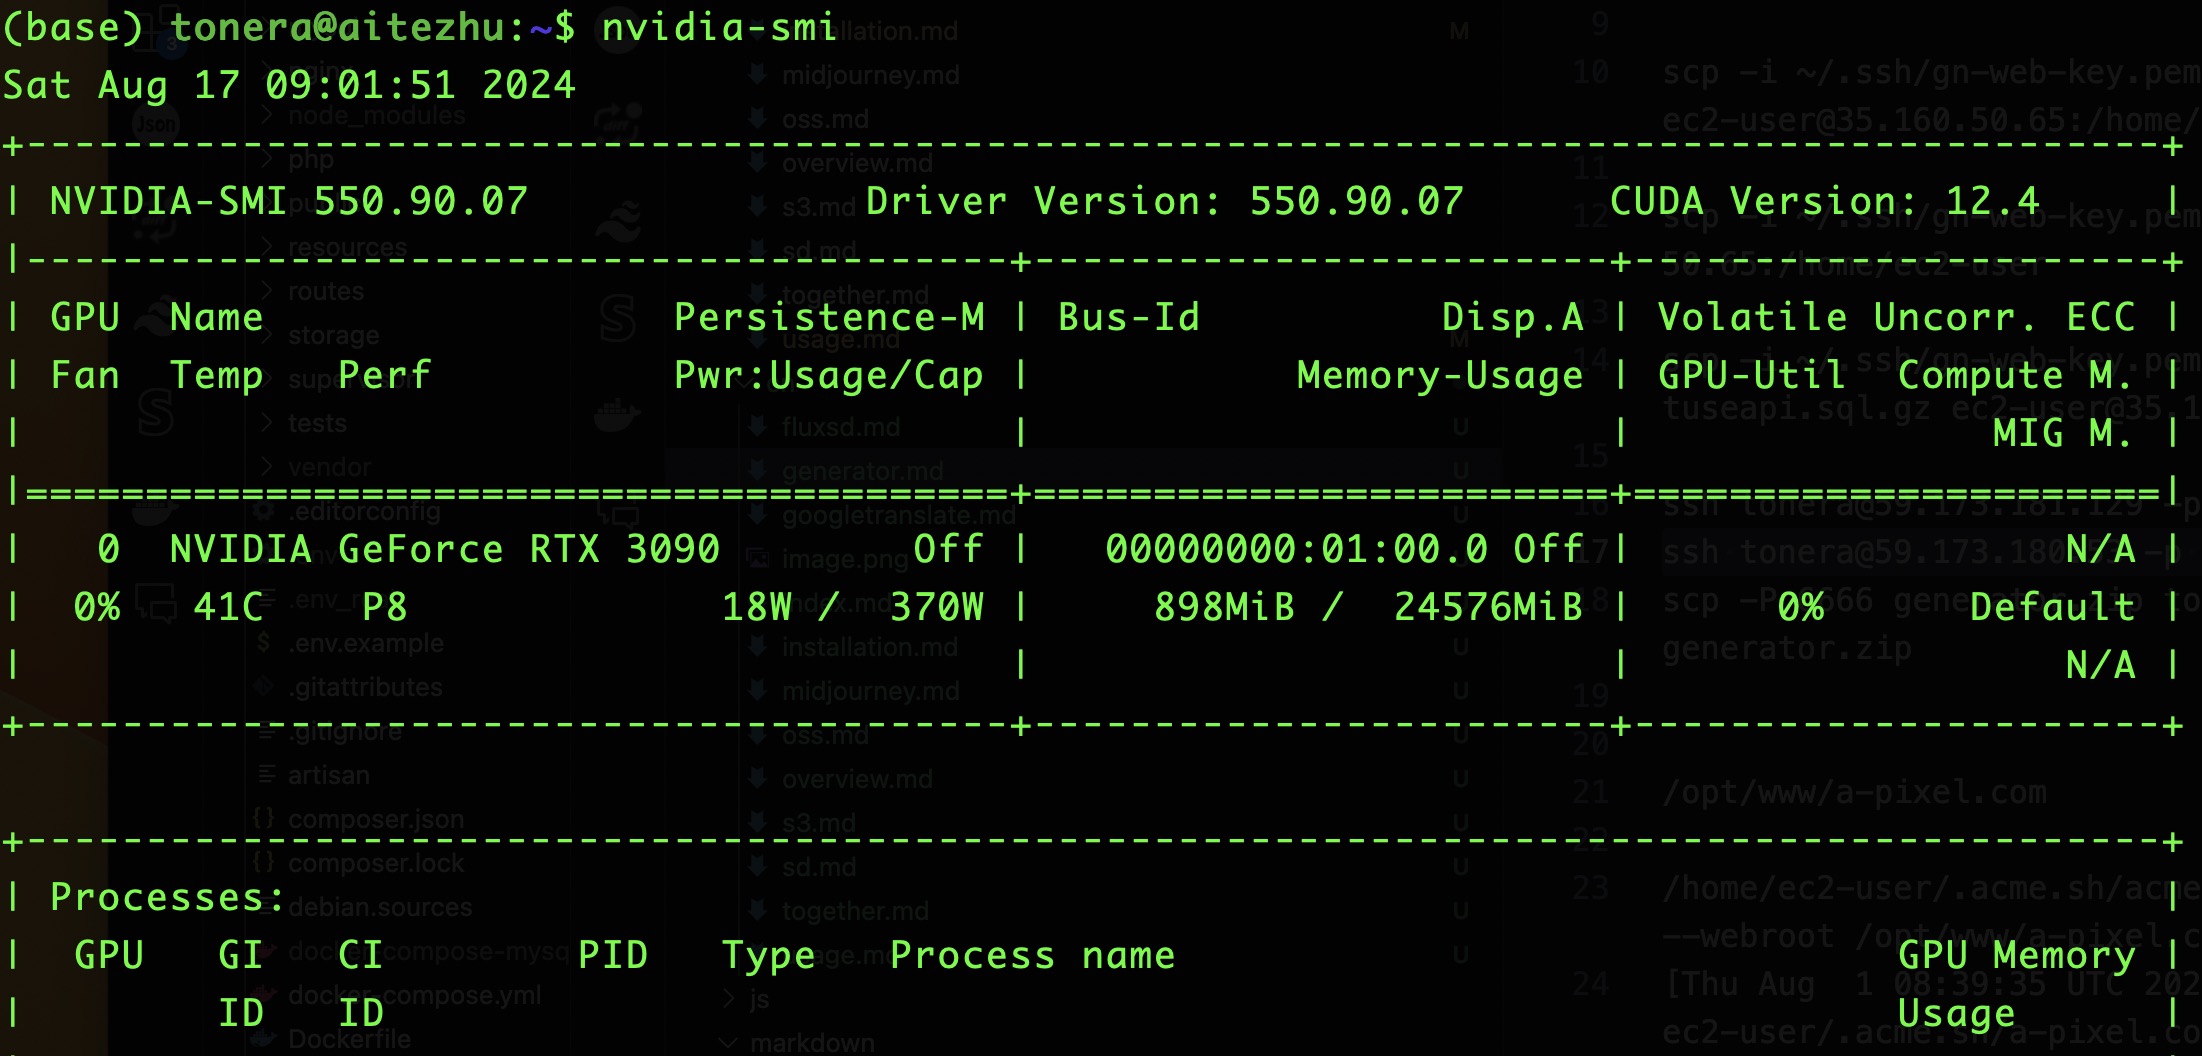
6. Configuration
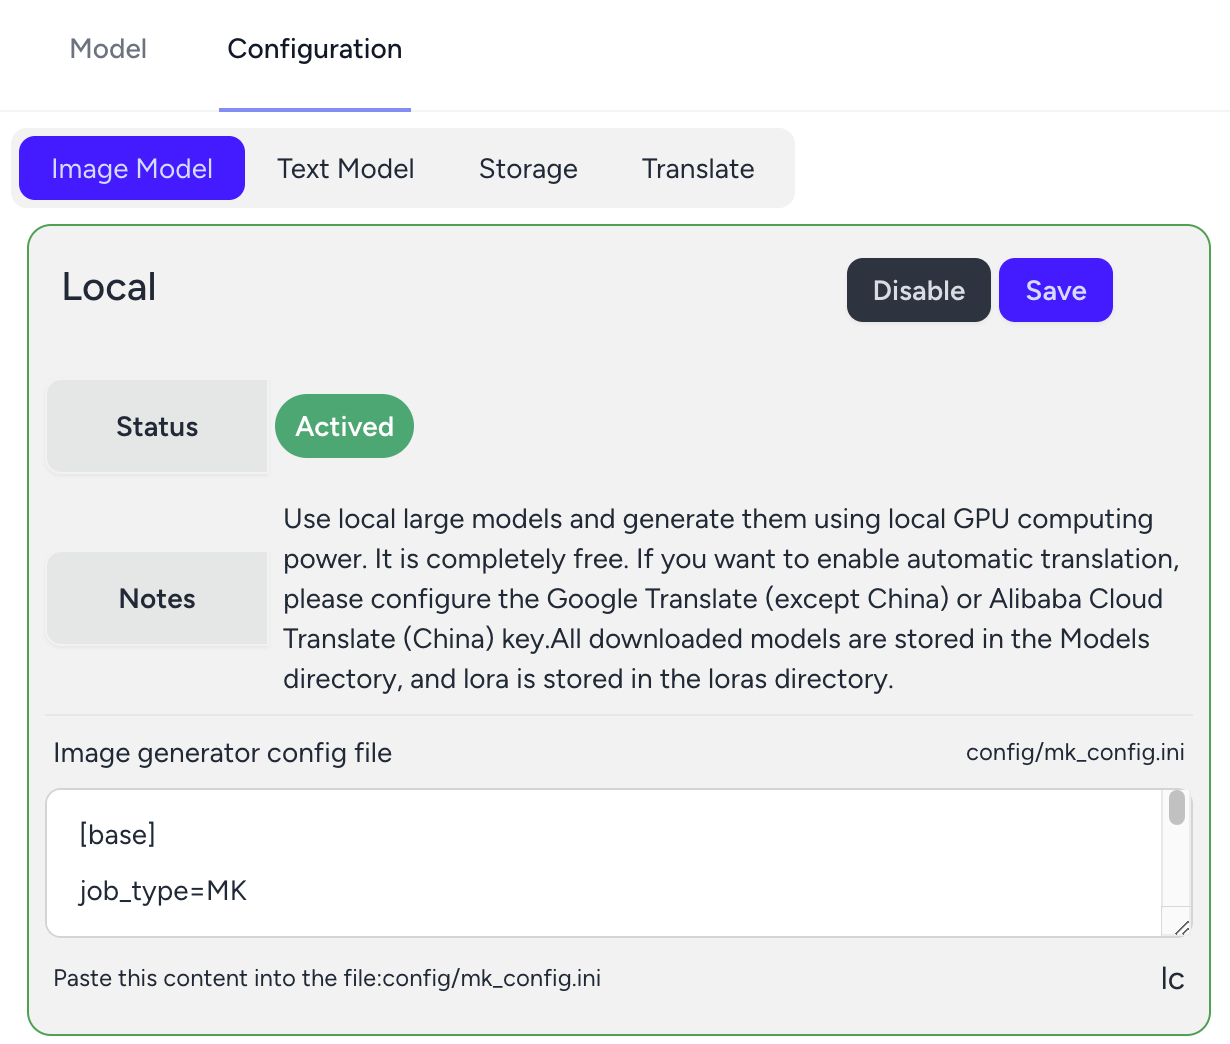
Open your fluxsd, open the configuration page, copy Configuration -> Image Model -> Local -> Image Generator configuration file, copy the contents of the textarea to the mk_config.ini file in the Generator's config folder.
7. Startup
python Service_atz2.py base8. Download the first model
Download url: https://huggingface.co/stabilityai/stable-diffusion-xl-base-1.0/resolve/main/sd_xl_base_1.0.safetensors
Move the model file to Generator's models folder.
Like this:
generator/models/sd_xl_base_1.0.safetensors
Now, you can open http://{Your ip}:8000 and generate images using the model in FluxSD.
Start to use
FAQ
- Error encountered when executing generator script in Windows:
INFO OSError: [WinError 126] The specified module could not be found... "... \ lib \ site - packages \ torch \ lib \ fbgemm DLL "Download the file "libomp140.x86_64.dll" https://www.dllme.com/dll/files/libomp140_x86_64/00637fe34a6043031c9ae4c6cf0a891d/download And save it to /Windows/system32 directory.
- Error:“numpy.core._exceptions.MemoryError: Unable to allocate 1.04 MiB for an array with shape (370, 370) and data type float64” The memory is insufficient. Please increase the virtual memory (Swap mem ) size.